


Master Personalized Products: The merchOne + Customily Guide
Selling personalized products has become a trend in the last few years and a must for online stores that want to stand out from their competition.
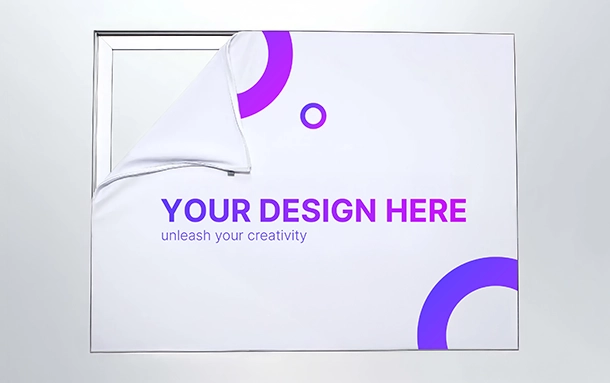
Nothing is more unique than letting your customers transform a static product into something personal with a special meaning.
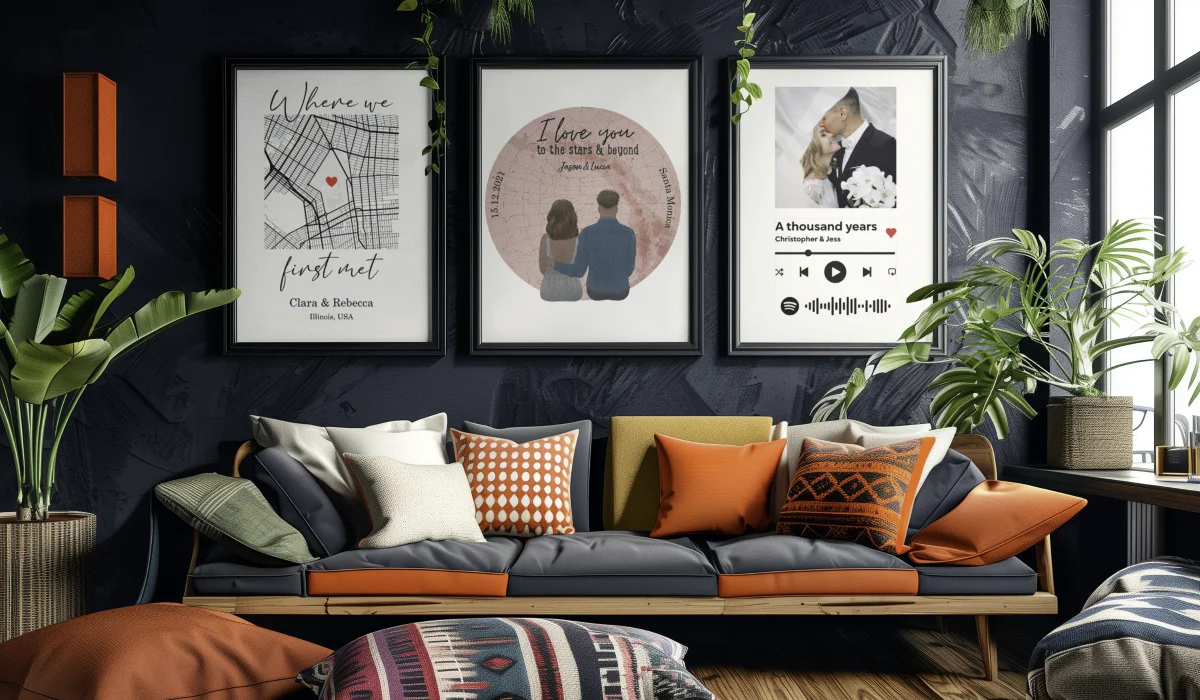
Throughout the year, many special dates make a perfect match for personalized products. Think about it. Valentine’s Day, Mother’s Day, Father’s Day, Christmas, Anniversaries, Birthdays, Graduations.. Any memorable moment of anyone’s life is a great opportunity for a personalized gift. The market is huge and will only keep growing as more and more people discover the power of giving a customized gift.
The great news is that either you’re just starting your online business or you’re a seasoned seller, adding personalization options to your print-on-demand products is easier than you think. You only need a trustworthy customization app with a comprehensive range of tools that allow you to turn any static product into a personalized one.
Disclaimer: This article is provided for general informational purposes only. Information concerning markets, products, services, prices, features, policies, availability and third-party providers reflects information available as of the date stated and may change over time.
Readers should verify current information with the relevant provider, platform or other authoritative source before making business or purchasing decisions. References to profitability, demand, margins, sales potential or business performance are illustrative only and do not guarantee any particular result.
What should you look at while searching for product personalizer apps?
There’s a wide variety of customization apps available, depending on which e-commerce platform you work with. Make sure to do your research at the time of choosing one so you don’t waste time! Here are some of the key elements any good solution will have:
- Essential customization features: The range of options will vary from app to app, but make sure it includes at least functionalities such as adding text, images, colors, and uploading photos. Those are the basic tools you will need, the more it has, the better. Features like customized street maps, star maps, cartoonizers, or AI image generation can make a real difference for your store.
- Live preview: Choose an app that enables customers to visualize their customizations in real-time before finalizing their purchase. This feature aids in informed decision-making and minimizes the likelihood of returns, ultimately fostering customer satisfaction.
- Printing files: Automating the processes is key to avoiding mistakes. You can offer the best personalization options, but if the final product has a mistake, the magic is gone. No one wants to receive a gift with the wrong image or text.
Alongside the live preview, the ability to download a printing file with all the information needed to fulfill the product is the secret sauce for a successful personalization business. - Prioritize Speed: Opt for an app that boasts fast and responsive performance. A seamless experience is crucial for retaining customer interest and preventing frustration during the customization process.
- Seamless Integrations: Make sure the application seamlessly integrates with other platforms you utilize, such as print-on-demand providers. This ensures the smooth operation of your store and facilitates the delivery of top-notch service to your clients.
- Multi-Platform Compatibility: Consider an app with multi-platform support to reach a broader audience. Compatibility across various e-commerce platforms and devices, including desktops, tablets, and smartphones, ensures accessibility and convenience for your customers.
Having said that, if you don’t feel like researching, we’re here to present you with a comprehensive solution that will cover all those essential features and many more! We’re talking about Customily Product Personalizer.
Customily now integrates with merchOne to allow you to add astonishing personalization options to their products, which brings to the table a fantastic solution for Shopify and Etsy sellers who want to make a difference in the print-on-demand market.
Thanks to this amazing partnership, selling personalized products online has become incredibly easy and fast. You can automate almost every part of the selling process, from receiving the order to fulfillment, and shipping, everything is taken care of for you. You only need to worry about creating beautiful products and marketing them to get the right people to your store!
So, how does it work?
If you’re ready to dive into the personalization world, here’s a full guide with everything you need to know to start selling customized products with the help of merchOne and Customily!
1. Installation
Let’s start with the basics, you will need to have an account with both, merchOne and Customily.
- You can register with merchOne here.
- For Customily, you have 2 options: you can either install Customily for Shopify, or Customily for Etsy.
2. Integration
Once you have your accounts working, it’s time to connect them. This step is crucial before starting to create and publish your products because it will allow you to have automatic fulfillment.
Automatic fulfillment means that once you start receiving orders, the information will travel from Customily directly to merchOne, so they can take care of fulfilling and shipping the products!
To connect your accounts please follow these steps:
- Login to your merchOne account.
- Go to Store, and create a new custom store by clicking Create.
Note: If you would like to link Customily with an existing API store, please start with step 4.
- Enter the desired Store Name and URL (Shopify subdomain), select the selling region and Customily Integration, and then click the Create button.

- Once you are done, access the store Settings to get the API KEY.

- Scroll down to the Store credentials section, to find API USER and API KEY.

- Login to your Customily App.
- Go to Settings and open the Integrations tab.
- Select merchOne from the Select a provider for integration dropdown.
- Click the enable integration button.

- Paste your merchOne API KEY and API USER, then Save Settings.

- Go back to the merchOne platform and paste the following Webhook: https://sh.customily.com/provider/hooks/orderShipped?provider=picanova

- Make sure to Save your updates both in merchOne and Customily App.


Well done! Now you’re accounts are connected! You’re ready to start creating your personalized designs and adding them to your merchOne products.
3. Creating your first product (using a design from Customily)
Let’s dive into Customily App. Something important you need to remember is that you will need to create and publish your products from Customily App in order for the whole automatic process to work correctly. Your products will be published in your Shopify or Etsy store from there.
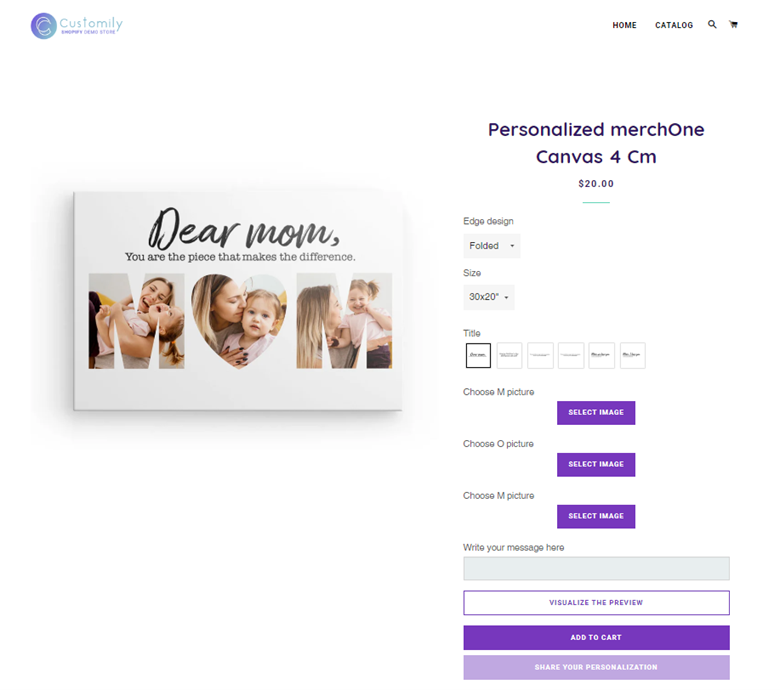
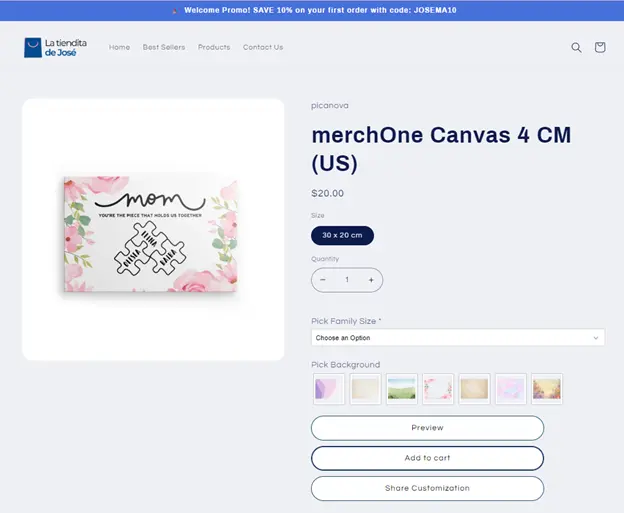
Imagine we want to sell a personalized canvas for Mother’s Day. At Customily you will have 2 options: you can use a customized design from Customily’s collection, or you can create your own design.
Something great about Customily that you won’t find on any other app, is that you have access to an incredible wide collection of clipart and designs ready to sell. There are over 300 designs available and the collection keeps growing every day! You can pick the one you want and sell it freely in your store, or you can also take one of the designs as a base and edit it to create your own version of it.
In this first part, you will learn how to create a product using a design from Customily. If you want to create your own designs, please go directly to part 4.
- Go to the START menu.
- Click on the Create new product button.
- Pick merchOne as your print-on-demand provider.

- Browse through the merchOne product catalog and pick the product that you want to sell (if you want to sell a printed merchOne product that’s not in the catalog, feel free to send an email to support@customily.com to request it to be added to the catalog!)
Let’s pick the Canvas 4 CM (US Version).
- Select all the variants you want to make available. In this case, edge design and size. Click Next.

- In this step, you will have to choose either to add a design from Customily, or from your own collection. In this case, we’re using a pre-made design from Customily.

- Browse through the collection to pick the design you want to add. You will find a search bar on the right where you can search by collection, for example, “Mom”.

- Select the design, and wait a few moments while Customily creates the product for you. During this process, Customily creates the product page – on your Shopify or Etsy store – for the product that you selected and adds the design with the personalization options to it.
- Once ready, you will see a preview of your product before publishing it. This preview is exactly what your customers will see on your store once the product is live. What can you do from here? Here are several tips:
- Play around with the personalized options and save the preview as the main product image of your listing.
- Play around with the personalized options to create different previews, and save those images to later use on your product page as secondary images. This will give your customers more ideas of what they can create.
- Go to Edit product details to change the title, description, and prize of the product.
- Go to Edit options to modify the order of the personalization options, and add or delete elements.

- Once you’re ready, click on PUBLISH to go live. You can also choose to click on Save draft instead.
With this option, the product listing will be created on your store as a draft. If you want to go live afterward, you will need to go to your Shopify store menu and set the product as Active. - CONGRATS!! Your first personalized product is now live in your store and you can start selling!


4. Creating your first product (using your own design)
If you don’t want to use Customily’s Designs and want to create your own, the workflow is pretty similar to what we described in part 3, except for having to create the design beforehand.
- Go to the START menu.
- Scroll down to My Designs. Here you will find 2 options, you can either create a new design from scratch, or you can start with a Customily Design as a base, edit it, and create your own version of it.
For this tutorial, we will create a brand-new design.
- When you click on Create new design, it will take you to Customily’s Design Studio. This is the place where you will upload your design assets and add personalization options, so you can transform a static design into a personalized one.
First of all, you will need to put a name to your design. By default, the design template will be a square of 1000.00 x 1000.00 mm, but you can click on Resize on the upper bar to change it to the size you need.
Then you’re ready to start uploading all your fixed design assets, for example, backgrounds or clipart (bear in mind that Customily is not a design tool like Canva or Photoshop, you may need to upload files to Customily depending on the complexity of the design you want to do).
In this case, we uploaded different backgrounds created on Canva, the title text, and a design of puzzle pieces. With Customily, we add personalized texts inside the pieces.
What else can you add with Customily? Curved texts, colors, textures, image placeholders (for the customer to upload their own photos), street maps, star maps, face-cutters, cartoonizers, AI image generation, and more.
If you’re interested in in-depth tutorials about Customily’s Design Studio you can visit their Help Center to find extensive guides or their YouTube Channel for video tutorials.
- Once you’re happy with your design, click Save Design.
You can create as many designs as you want, and then apply them to different products. Once you populate your “My Design” section, the workflow is almost the same as in Part 3. - Go to the START menu.
- Click on the Create new product button.
- Pick merchOne as your print-on-demand provider.

- Browse through the merchOne product catalog and pick the product that you want to sell (if you want to sell a printed merchOne product that’s not in the catalog, feel free to send an email to support@customily.com to request it to be added to the catalog!)
Let’s pick the Canvas 4 CM (US Version). - Select all the variants you want to make available. In this case, edge design and size. Click Next.

- In this step, you will have to choose either to add a design from Customily, or from your own collection. Now we’re using our own design.

- Browse through your designs, and select the one you want to use. Wait a few moments while Customily creates the product for you. During this process, Customily creates the product page – on your Shopify or Etsy store – for the product that you selected and adds the design with the personalization options to it.

- Once ready, you will see a preview of your product before publishing it. This preview is exactly what your customers will see on your store once the product is live. What can you do from here? Here are several tips:
- Play around with the personalized options and save the preview as the main product image of your listing.
- Play around with the personalized options to create different previews, and save those images to later use on your product page as secondary images. This will give your customers more ideas of what they can create.
- Go to Edit product details to change the title, description, and prize of the product.
- Go to Edit options to modify the order of the personalization options, and add or delete elements.
- Once you’re ready, click on PUBLISH to go live. You can also choose to click on Save draft instead.
With this option, the product listing will be created on your store as a draft. If you want to go live afterward, you will need to go to your Shopify store menu and set the product as Active. - CONGRATS!! Your first personalized product is now live in your store and you can start selling!


In conclusion
Now you’re ready to start creating your first personalized products!
Bear in mind that Customily’s tools are extensive, and there are many more things you will be able to achieve with them. But don’t go through the rabbit hole just yet, it’s best to start with the basics so you don’t get overwhelmed!
If you need assistance with Customily’s tools, don’t hesitate to reach their support team at support@customily.com. They will happily help you and guide you through your first steps with the app so you can have personalized products published in your store in no time.
Ready to join the customization revolution? Don’t waste any more time and start today, the sky is the limit!
Happy selling!
Bonus
Fan of video tutorials? Don’t worry, we got you covered. Watch our latest webinar to find all the information shared in this guide, step by step!
